Today was such a great day! Hellaciously long – but great! I made my day much easier by packing my breakfast, lunch, snacks, and dinner (that’s right – freaking dinner) before leaving for class this morning.
Mondays are my long days. 14 hours on campus. 9am-11pm. Brutal. The key to making it through such a time-intensive day, is to plan for meals. I’m basically a rogue honeybadger, and completely fit for a Snickers hangrycommercial, when I lack sustenance. In an effort to keep myself from fast-food lunch runs, or snapping at my peers for chewing too loudly, I made the effort to pack my lunch.
I’m trying to eat healthy, without breaking the bank. Student loans are enough debt for me to be in, without adding in eating out and coffee runs. Don’t get me wrong – splurging every now and then is awesome; I simply can’t live every day that way. My world would crumble and my credit score would, presumably, implode.
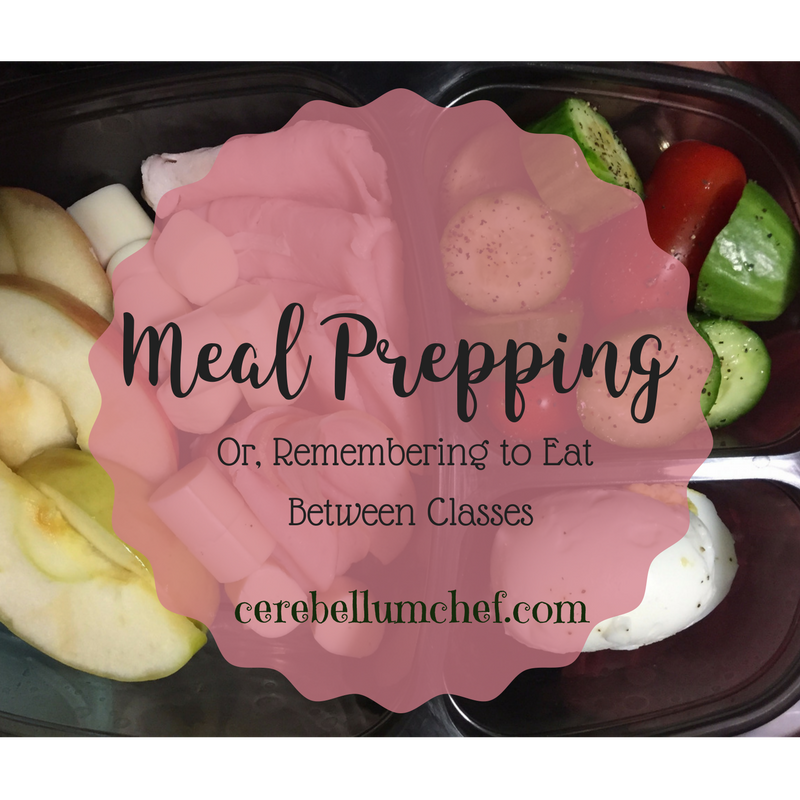
Foregoing chaos to my financial situation, it made much more sense to prep my meals. It’s simple. Either pack something you made for dinner the night before; or, put together a set of five protein boxes on Sunday night. My inspiration came from the Starbucks box, which is tiny and compact. I needed a bit more oomph in my meal, so I added turkey and an extra cheese stick instead of the grapes.
4 slices of turkey + 1/2 apple + 2 Mozz sticks + 1 egg + grape tomatoes + Cucumber slices That’s all.
Super Simple. Clean Eating.
Since I don’t like eating the exact same thing every day for a week (unless that something happens to be Chicken Alfredo with Broccoli), I made 3 boxes; there are just enough to get me through the hectic part of my week. On Wednesday night, I’ll make sandwich pinwheels!
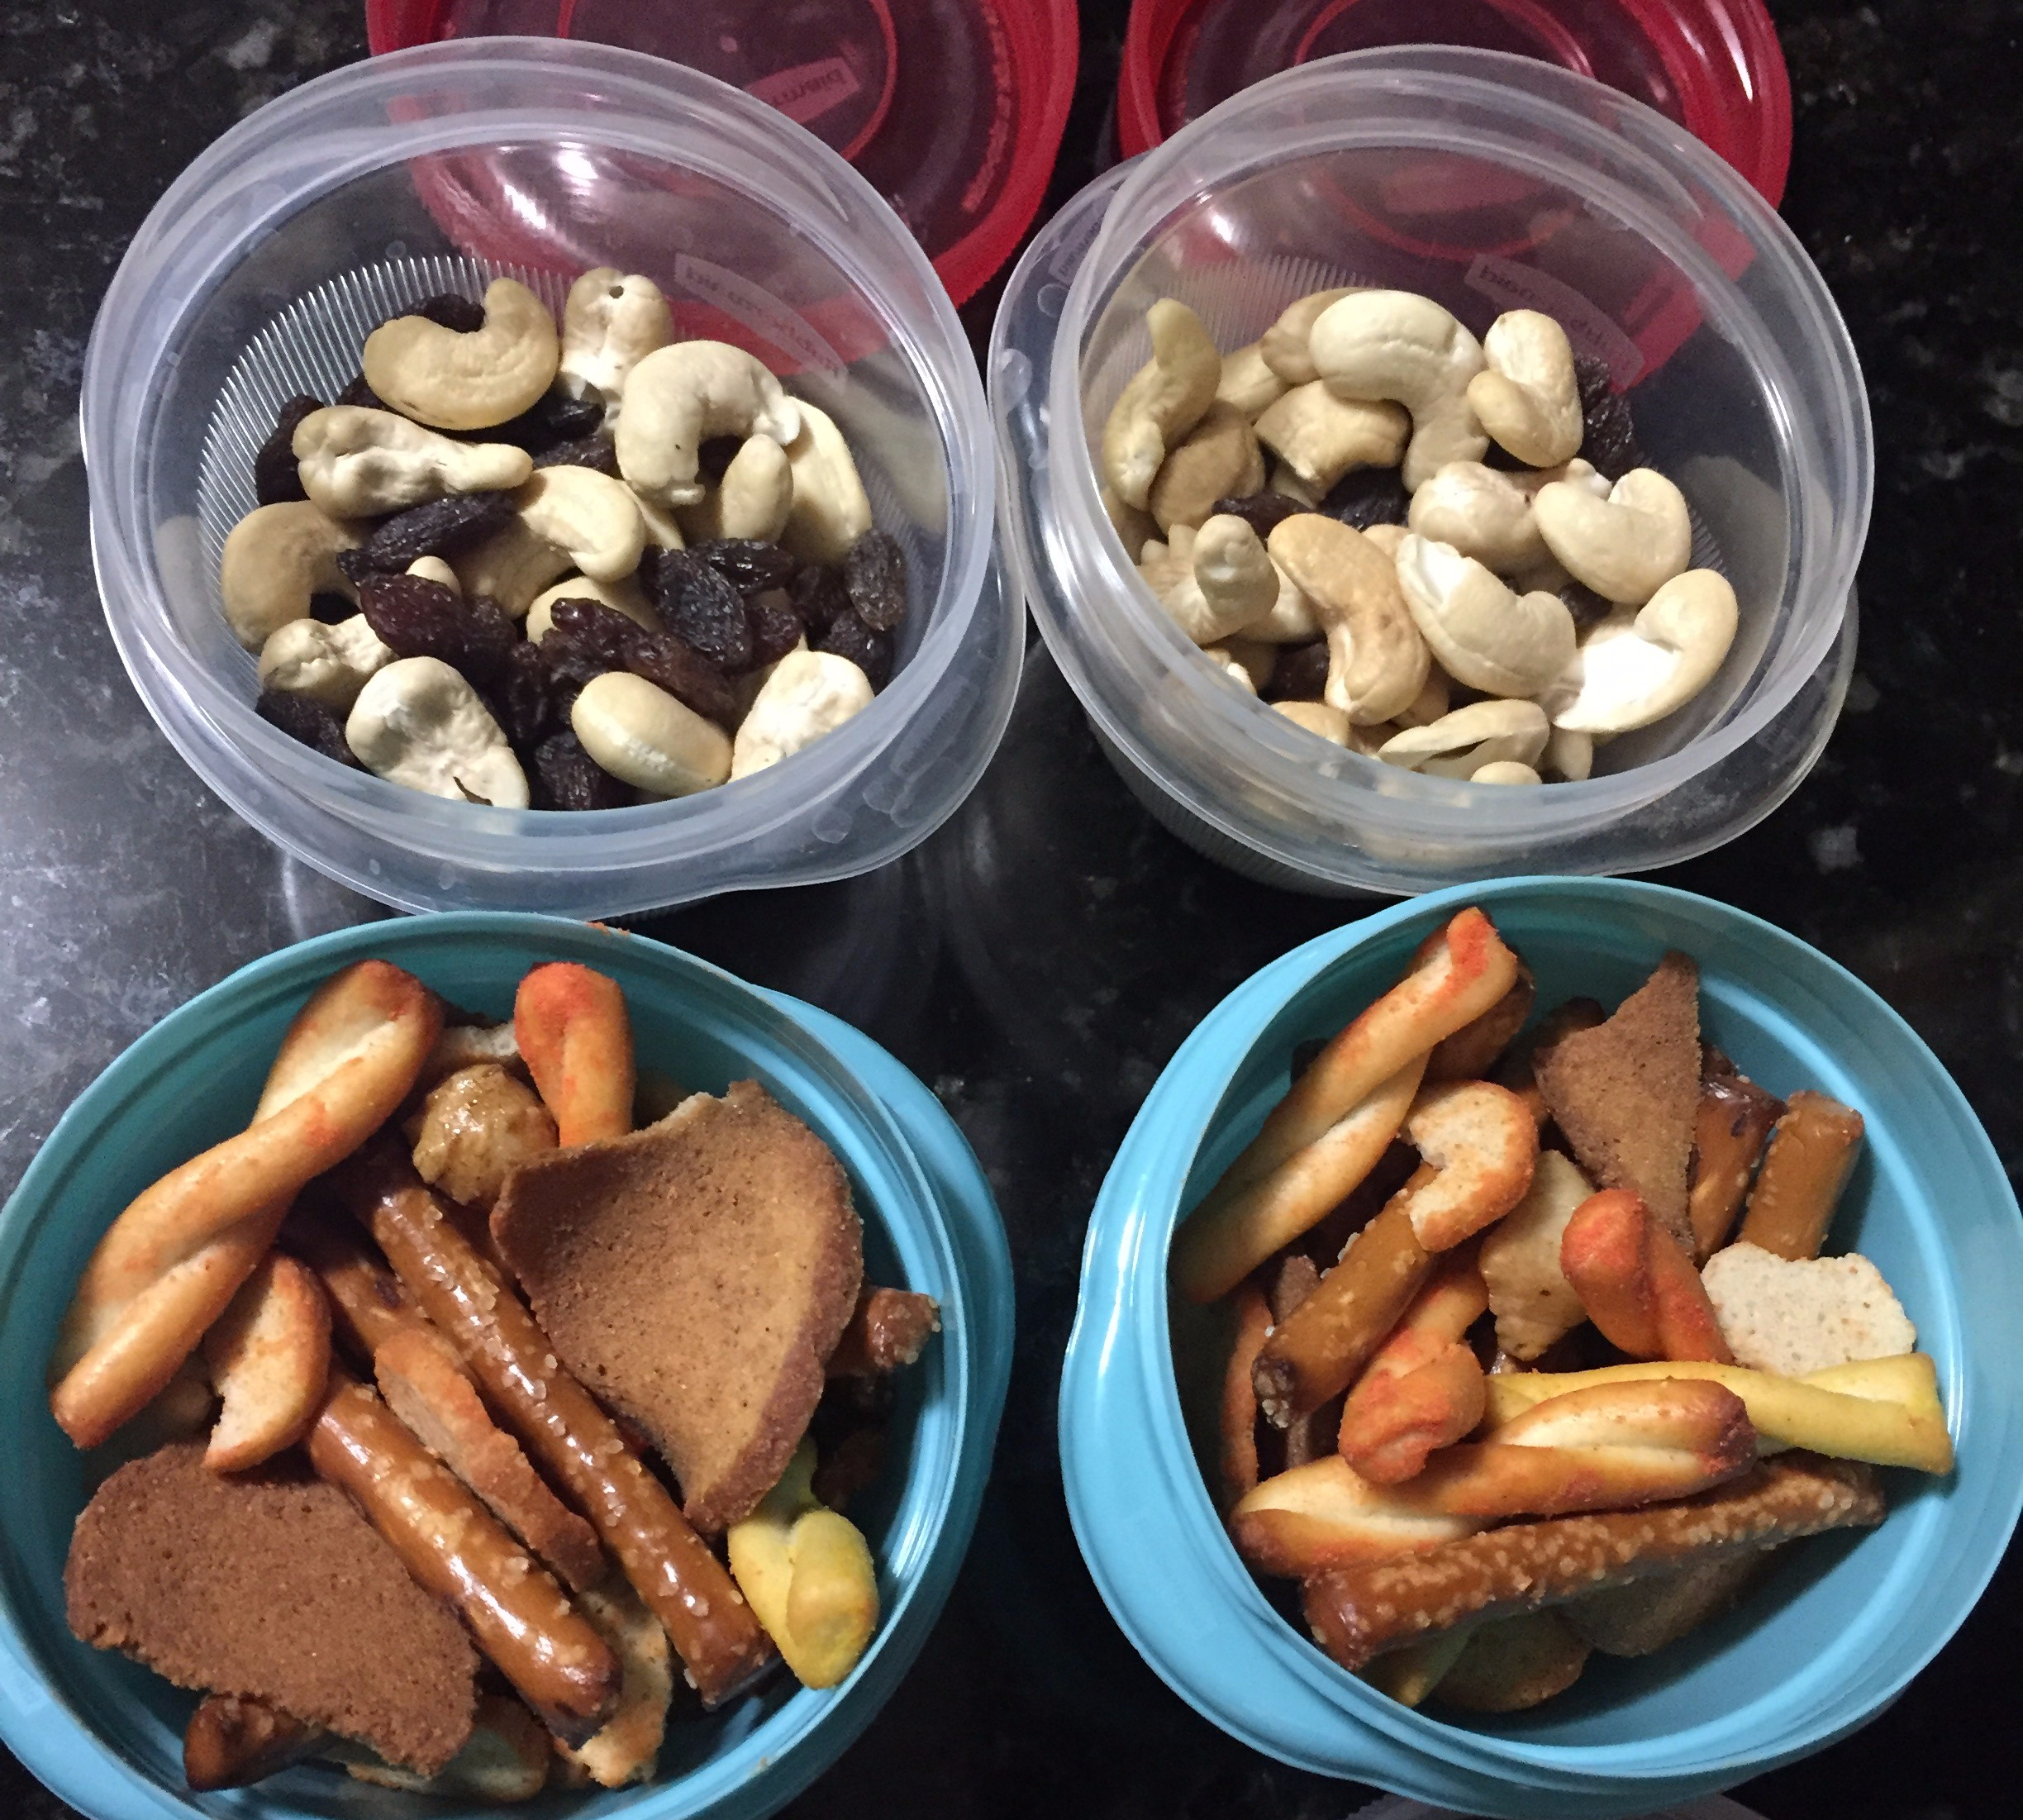
In addition to my protein box, I packed some snacks! They were perfect to munch on during class. I did feel a bit like a chubby squirrel though, and I’m not entirely sure I wasn’t making too much noise while trying to woodchuck the pretzels. No one complained. Hopefully.
Utz Pub Mix + Cashews & Raisins
See? Meal prepping is easy! Don’t let the “prep” scare you. Just pick a few things you love to eat, place them into a portable container, and voilà! Personally, I do not enjoy eating the same thing every day – which is why small-batch cooking works well. I’ll be sure to post some recipes for breakfast sandwiches, tacos, and lunch boxes – SOON!
In the meantime, tell me – what are you planning on taking with you this week?
This post has been a long time coming. So long, in fact – that we’re still total chubsters in these snaps. Goodness.
Well, you guessed it – I’m going to talk to ya about making a pallet!
Here’s what you’ll need:
1. A Reclaimed Pallet – make sure it’s HEAT TREATED (marked HT on the slats). You might be able to snag one of these for FREE by heading out to your local hardware store. Sometimes these guys and gals are pretty awesome and they recycle their pallets, so be sure to head out early on a weekend or speak with a manager in advance.
If you can’t find a reclaimed pallet, you can always make one. Just note – it can get pricey.
This is a used pallet, but not heat treated – so you wouldn’t want to plant food stuffs in here. Regular plants are completely fine though!
What’s heat treated? It means the wood has not been treated by chemicals, resulting in the awesome ability to plant fruits and veggies within the pallet slats. If you were to use a chemically treated pallet, you might get sick. We definitely don’t want that!
Cerebellum MOM came with us on this adventure. Hilarity ensued.
Now, we were only able to find chemically treated pallets or really beat-up heat treated ones. Being the enginerds we are, the beau and I chose to build a pallet. That’s right, we got down and dirty with a sexy power drill and made sure not to split our wood with extra-long screws. More on that later…
He looks bored, but I promise – he wasn’t! We were on the hunt for the right size wood…and it was a bit of a process.
We chose to purchase standard 2X4s, heat treated – which we found, all the pre-cut wood at Home Depot was in such a condition. When you pick out your wood pieces, be sure to avoid anything with notches, or “pretty” grain imperfections. You want your pallet to be even and not bowed. It’ll be more difficult to work with and screw together.
OH! Don’t forget to let the awesome peeps at HD cut your wood for ya! Just one less thing you need to do.
This is Bob. He’s a measure twice, cut once kind of man.See what I mean?
We made a few friends while running around the home de’pot…and everyone was so nice! It was great to have so many wonderful conversations about food, eating healthy and the best way to cut down wood. You know, the normal DIY convos.
Everything you need to start your pallet garden! Wood Screws Garden Fabric Staples + Staple gun Seeds! [Or saplings…you choose!] Water Pail Paint and brushes, to decorate – of course!
We got everything together and then went to work!
Remember what I said about the wrong screws?Well, such tiny machine bits are key to the whole building process! You’ll need to get coarse thread drywall screws, with good threads. Not too big, if you’re going to use the same size wood that we did – otherwise, you’ll split the wood and screw the pooch on this project. Trust me. we bought 1-1/4″ X 8GA screws. They worked like a charm!
Close up of the veggies and fruits we chose
This is the fabric you’ll need to purchase. It retains the water and soil in the pallet so you don’t have a huge mess everywhere!
Here’s the setup. We made sure to place everything the way we wanted before screwing the boards in place.
I did say not to choose “pretty” wood…but if you’re aiming for an au naturale look – then do try to get the best un-bowed wood you can find.
And so the drilling began!
The beau enjoyed this part so much, that he didn’t even want to let me use the power drill. Plus…I may have gotten a wee-bit out of hand when he finally did let me use it and got so caught up in the crazy-powerness of it all and almost split the wood. It’s sooooo much fun building these DIY projects! Bwahahaha!
Almost done!
He made quick work of it and the entire pallet was put together lickety-split!
FINITO!Garden fabric is super cool and really helpful! It keeps the soil in and is really quite nifty!
This fabric can be found in the garden section. They had a few kinds, but make sure not to purchase the meshy kind. You see in the picture above that there are no holes within the fabric. If you were planting the pallet in the ground, which you can, then you’d want the meshy type so the water may seep into the soil. Since we live in an apartment with no yard, the holey kind was a no-go.
We used nearly 250 staples to keep this fabric in place!
Super close and nearly straight…I got a bit lazy with the staple gun.
Fully set upOf course we painted our pallet Baylor Green! In yellow paint, he says “Lettuce turnip the beet!” Because I’m nerdy like that. ;]
Next we set the pallet flat on the ground, fabric down, and filled the pallet with 4 full size bags of moisture control soil. Honestly, we think another full bag may have been helpful to keep the seeds in place once we stood the pallet upright.
Be careful though!
You need to give the seeds (or saplings) time to grow roots. They have to latch onto the soil and then (in about 3 weeks if you planted seeds, 1.5 weeks for saplings) you can turn the pallet 90 degrees upright and stand it up. Make sure these little guys get plenty of sunlight and water.
One recommendation I’d make is for you to ADD Casters! They’d be helpful to move the pallet around because it is deceptively heavy. Seriously, oomph!
Happy building for the upcoming spring fruits and veggies! You should start planting in mid-February!